Here's the one V-Day card I managed to make for my DH. I like how it turned out, and I also will note that he doesn't mind pink. I held back on adding any glitter, but just barely. And mostly because I didn't want to have to deep clean my workspace afterwards. (craft herpes!)
The clean up of all the cut-outs ended up in my visual ephemera journal as Valentine Leftovers.
Showing posts with label CriCut. Show all posts
Tuesday, February 15, 2022
Monday, February 14, 2022
Forever V-Day
Sure it's a "Hallmark holiday" and all, but still, it's a sweet idea to have a day to communicate your love. This is an inadvertent heart-shaped KaleidaCam of my holiday table runner. (Now washed and put away until December). I don't have a Valentine's one, maybe I should put that on my table-runner to-do list?

I got a good start on the Valentine's card I'm making for my DH. I had a bit of a fail at first, but it turned out I just needed to change out the teeny tiny blade on the main cutting device. It's very easy to do, just like changing your rotary cutter, they wear out eventually.
Labels:
cards,
CriCut,
holidays,
kaleidoscope
Monday, October 18, 2021
Initial Ink Experiment
I finally tried out the Infusible Ink pens I bought to use with my Cricut. This is the back of a piece of white printer paper that has the design inked on it by the machine. I noticed that it actually bled through onto the sticky mat a little bit. I guess I have to figure out how to clean that ink off before I use that mat again.
Then I ironed it onto the turquoise fabric. It definitely transferred, but it's a lot of steps lighter than the image on the paper. My iron probably doesn't get hot enough. Of course they sell an additional pressing gizmo that gets hotter, and nope not buying that.
I'm glad that I remembered to use a press cloth because it bled through to the other side and it would have gotten the ink on my iron.
I'm going to try this with another iron that we have that I know gets to a higher temperature than my Oliso iron does. I might also try our paint-stripping heat gun to see if I can get it hot enough to really transfer.
Hopefully without setting anything on fire or scorching the material.
Tuesday, October 12, 2021
Almost Disaster Letters
Here's a little more about the letters for the Remembrance Project. This shows the difference between the color of the card stock and the fabric.

As it cut, the paper layer separated and started getting dragged around, but it kept going. It didn't seem to be a catastrophic thing so I let it keep going. But yikes on bikes, right?!
I was surprised to find that most of the letters survived or were close enough to use. I have a feeling that Steam-a-Seam is not what this is calibrated for, probably one of the thicker ones like Heat n' Bond or something would work. The paper on Steam-a-Seam always comes off very easily instead of being really stuck on like the others.
Saturday, October 09, 2021
Halloween Again
With having the Circuit around, I figure I pretty much have to make something Halloween-ish every year. I had my eye on this project last year but I didn't have enough of the right colors of cardstock. But this year I do....mwahaha.Soooo many layers and colors, this is the most complicated project I've attempted so far. This is just four of them assembled here.
The fun thing with these Cricut projects is that you can change so many things, like the purple here was a dark grey in the project pictures. But I was out of colors of grey, and I liked how the purple looked against the black on the frame.
Wednesday, March 24, 2021
Lucky Lucky
Time for an anniversary card!
I really loved this design and the idea behind it.
Because it's so very very true.
Being married for so long (31 years today!!) it is absolutely an adventure, loving the same person through all the changes and circumstances that have come our way.
Lucky lucky am I. Friday, March 19, 2021
Tassels Again
Once I had the Sizzix cutter out and cutting out tassels out of card stock, I couldn't help trying it out on something a little more flexible. In my scrap basket the Color Catchers I used after the red fabric dye rescue were waiting for me. They're just about *almost* fabric so I tried them out on the tassel die. They cut out perfectly.
This is what the piece that's been cut looks like when you take it off the Sizzix die. The die includes a little separate rectangle to use as a hanger for the tassel. The first card stock I tried it out on was plain white so I marked it up a little so it would be more interesting once it was rolled up. But first I glue-sticked the hanger on the top.
I rolled all the card stock and the color catcher tassels up, using lots of glue stick and then secured them at the tops to dry with binder clips. I used two pieces of card stock on the dual colored tassels because I just thought they looked better that way.
They turned out pretty cool and I think I might string them up with the stars I made with the CriCut. You'll note, I have yet to try this fabric yet! I'll get there.
Friday, December 18, 2020
Cricut and Electric Quilt Applique
Friend Jaye sends me interesting links about using the Cricut for quilting stuff. And this time it was about using Electric Quilt 8 appliqué images with the Cricut. I thought it would be worth the time to give it a try. I chose the fabrics, all prints, except the grey and very light grey and ironed on some lightweight fusible web on the back. I downloaded the file at the link and imported it into the Cricut design space software as an .svg file. I resized it in the program (didn't have to use Inkscape this time) and was ready to cut in moments.
I misread the instructions and chose as the material fusible fabric, so the tool recommended was the knife blade instead of the rotary cutter. That led to this lovely disaster. Luckily no cuts were actually made in the material before it got all bunched up.
I smoothed it out, chose cotton fusible and with the rotary cutter all was well.
It's funny to me that after the cuts have been made, it's very hard to see that anything has happened right up until you peel back the background and see what's left behind on the mat. You will note that I removed the backing paper and stuck this fusible side down on the mat. Sticky meet sticky.
All the parts got cut out with no problems, I used the picture of the final project to arrange the pieces in the right order.
Pretty cute, huh? Now to fuse it down and stitch the edges. I really like the prints that I chose.
And also now to install my copy of Electric Quilt 8 and see what other appliqué images are available.
Labels:
applique,
CriCut,
electric quilt
Sunday, December 13, 2020
Shiny Happy
I tried something even more new the other day. I bought the brand new foiling kit from CriCut, it comes with a special foiling tip and sheets of foiling material and this very nice white tape. The hardest part of the whole endeavor was figuring out where exactly the foil material needed to be relative to the design on the mat. Once I had that measured out, I realized the design needed to be two sheets wide. I overlapped two of the sheets and taped them down really well and kinda crossed my fingers that it wouldn't get messed up too much once the machine started working. The second hardest step was getting the sheets taped down without any gaps or wrinkles. Luckily the tape is repositionable and doesn't wreck the paper at all.

The foil embossing tool is slightly blue so you can tell it apart from the other ones. I liked the clear instructions about having the shiny side up on the foil.
This is what the foil looks like after going through the machine. I guess it's not reusable? Not sure on that, might have to play around and find out. At the very least I'll use it in a collage somehow. This design element was on the flap of the envelope which I thought was very clever.Here's a close up of the design, you can see where the overlapping sheets of foil were joined, but just slightly, so I called it a win and sent it off to the intended recipient. Hopefully Cricut willl sell wider sheets, or I can find another brand that has a bigger size that will work.
The whole card in all its shiny glory. Now I can still have shiny without spreading the herpes of the crafworld around--glitter.
Thursday, November 12, 2020
Go Bears!
Here's the logo of the university I attended, University of California at Berkeley. This is the one my parents and mom's parents did too. We yell "Go Bears!" all the time, it's a generic Woohoo! for our family at this point. Sometimes in public, my dad will yell it at someone wearing Cal branded clothing. Every now and then the person will yell it back at him which he loves. Usually he gets a confused look. sigh.
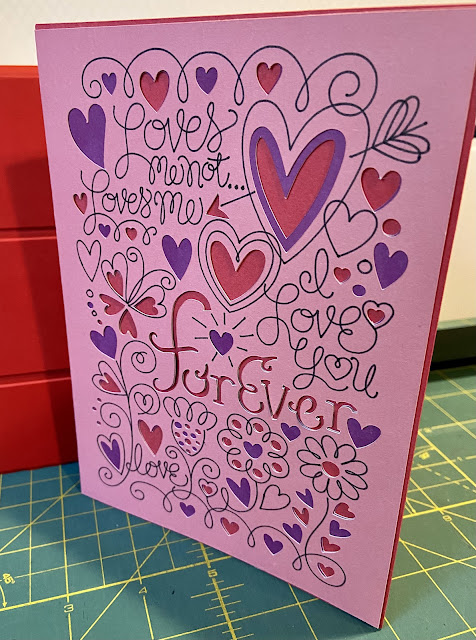
I'm working on making cards for people's birthdays ahead of time (instead of on the day of, hah !) so I'm making one for my dad. I've been playing around with importing images into the CriCut software and the Cal logo seemed like a good one to try out.
It was super easy to bring the image into the program. I really like how the Design Space software works on my laptop better than on the iPad, it's much more robust. So...I really like how it looks on this bear!
Go Bears!
Friday, October 30, 2020
Only One Halloween Card
I had big plans to make a bunch of Halloween cards with my CriCut to send out, but the power outage threw a monkey wrench into the works. So here's the one and only card that I got done. In the original design that I was using, the background yellow was a printed piece of paper. I thought the plain yellow just didn't work.
So out came the ink stamping pad. I used the end of a plasticized cork to make these variegated rough circles. I think it worked!
Yes, better.
And next year, I hope that there will be a few more cards made.
Friday, August 07, 2020
Right-Sized and Cut Out
CriCut success achieved after several attempts. I buckled down and figured out the re-sizing thing with the SVG files and was able to cut out the pieces for the Cotton Candy pouch for friend Jaye. Cutting out the cotton fabrics and the Shape Flex (fusible woven interfacing) was easy peasy.
But then there was the Bosal In-R-Form, fusible foam pieces that needed to be cut. This material is quite thick, so I looked up tips on cutting out thicker materials as I haven't done anything on the CriCut except cardstock and cotton fabric. The first suggestion I found was to use the regular grip mat (note the green) instead of the fabric grip one (the pink one above). The second suggestion was to select "Felt" as the material and to switch from the rotary cutting blade to the fine point blade (basically an e-xacto blade). I watched as the machine went around this rectangle two times. And it did not successfully cut through the whole thing. It got through the foam layers, but not the backing material. I switched back to the rotary cutter and selected "Heavy Fabric" and it was perfectly fine.
Another tip was to use a brayer to really get the material stuck down to the mat. My brayer has ink on it, so I used my smaller Clover seam roller instead. I concentrated my efforts especially around the edges and where the foam was a little wrinkled. It's not like you can iron this stuff, since it's a fusible. I found that it worked very very well, there were no problems off it shifting or bunching or moving at all.
Here's how it looks after cutting, lifting up the corner to see if it went through, huzzah, yes
And here's the curvy piece all cut out, this would be very hard for me to cut accurately, so I was happy I got the CriCut to work. All of this work was part of learning how to use a new tool, and I'm glad Jaye asked me to try it out.
All the pieces are finally cut out and sent off to friend Jaye, I hope she finds my fabric choices acceptable <g>
And yes I cut out a set of bag pieces for myself to try out making this very cute bag.
Tuesday, July 21, 2020
Sizing It Up
I've been working on using my CriCut to cut out the fabric pieces for a SewSweetness Cotton Candy pouch. Mostly because friend Jaye asked me to because she was curious to see how it worked. I was curious too, and am trying to learn more about this fancy and useful gizmo.
It was very easy to import the .SVG file into the maker space canvas in CriCut, but unfortunately, it didn't translate to the intended size. Look at how cute and teeny this is?!?
In addition to the size issue, it was automatically cutting out all of the letters involved in spelling out:
1 " s q u a r e . That's what those little bits to the right of the square are.
Taking out the latter was very easy, but getting the main part of the pattern resized correctly was harder. At first I tried eyeballing the 1" square to the gridlines in the maker space program, and it got pretty close, but still wasn't exactly right. And that would mean the pieces wouldn't quite fit together, which would honestly be accomplished by me cutting it all out manually!
I hunted around online and thankfully came across a helpful article that explained what to do to solve this problem. I downloaded a free vector program called Inkscape, opened the files and noted down the actual size by the original pattern maker (in this case, SewSweetness). Then back in the CriCut maker space, after importing the file and selecting all, I typed in those numbers into the sizing box, and voila' instantly adjusted to the correct size.
Now to cut out an entire set and see if it goes together correctly or not!
Monday, July 20, 2020
Two Cards for Two Ages
I'm trying to keep on using my CriCut maker when I need a card. That way I'm not out shopping and touching cards that other folks have touched. And I'm learning how to use this machine too. I don't have zillions of colors of cardstock but I'm mixing and matching for unusual combinations.
This first card is for my niece's 15th birthday. I can't believe I have a niece that is 15!
She likes weird stuff so I figured she'd like a monster. It's a very 3-d construction with a folded bridge in-between the two pieces. I had to use colored pencil on the balloons because I didn't like how they looked in the white.
I liked the clever envelope on this one. The balloons are attached with a little brad so they can swivel around and fit inside the envelope.
Here's the card I made for my mom. She loves green and southwest designs, so I thought she'd appreciate this one. I tore the envelope when I was pulling it off the mat so I used Washi tape to hide that error. We had a discussion about glitter, and she said usually she doesn't like it in the house because it gets everywhere, but she'd make an exception since I made the card for her. I told her I understood as glitter is widely known as the herpes of crafting. She laughed for quite a while at that one.
She just turned 80! I can't believe my mom is 80!
Subscribe to:
Posts (Atom)


