Now they're all rolled up and ready to dye. It's a little fiddly, but keeping track of which color got over-dyed in what other color is going to be very interesting. I can't wait to compare them all!

Here is number 41 in the weekly series of six-word memoir quiltlets from last year. Yes, it was surgery week, middle of October. And no, I didn't complete this quiltlet actually in that week (obviously!), but soon thereafter. This one is not too exciting or innovative, as far as materials go, the hospital bracelets are some type of Tyvek-ish material, easy to sew through, and the three circular metallic snap/plastic things are from the EKG.
And now I'm caught up on showing you all the six-word memoir quiltlets I've made so far, this one is #26. Woohoo! Half-way done with the year.
I used my ticket and wrist band for the Maker Faire that we attended. Sewing through the Tyvek wristband was very easy even though it is slippery stuff.
Dichroic glass=very heavy. Especially for quilt embellishments. To support a piece such as the large triangle on the left without distorting the quilt surface would take some engineering. Which is probably why these are unused as of now. Maybe they should just be jewelry instead, several of them look like they'd be great pins. I think Margaret Ball gave me these ages ago and I'm sorry I haven't ever used them, just taken them out every now and then and enjoyed looking at them. They have so much depth and you always find something new to see within the glass. They've been in a little box which just got discovered (during my recent embossing heat gun search) with these completely opposite embellishments-to-be-used:
These are metallic painted and heat treated Tyvek "jewels". That's how I always think of these, because of the shiny metallic paint that I used, they really glow and have a nice shine. In a different way than the dichroic glass above of course, but still shiny. I think they have a lot of presence because of their unusual and organic shapes, you're not sure what exactly they are, so they require more up close investigation.
The way that the Tyvek folds in on itself and bubbles up is so unpredictable which is a big part of the fun of making these. They are easy to use as an embellishment on a quilt, you can pierce them pretty easily with a needle and they are super lightweight and easy to bead upon.
Another reason that I need to find my embossing heat gun, so I can make some more of these!
Here's a Scary Doll how-to, to make the doll I showed in my Halloween Party post on Saturday. I got the idea from WiseCraft ,but their starting dolls were fashion dolls (ie Barbies), our Goodwill was fresh-outta-Barbies so we snagged this curly haired doll whose hair was a little out of hand to start with.
The first step is to spray-paint the doll with a matte white spray paint. Front and back, hair included. Do a couple of light coats. Outside of course! My son Alex helped me out with spraying so I could take an action shot. I figured if I tried to do both I'd end up spraying either myself or my camera lens somehow.
She was scary looking enough already for me at this point.
Here she is after being ever-so-slightly singed with a heat gun used for paint stripping and Tyvek melting. I think this made her even creepier, more worn out and old-looking, kind of ratty and dirty and decrepit. And by the way if you do this burning step, do it outside (very stinky since all the materials are synthetics), and have a source of dousing water at the ready.
I think she's pretty scary looking. In the original instructions they were suggesting going over the faces with black Sharpies to make more zombie looking faces, but I like this ghostly apparition vibe.
Here I am at the recent opening of the California Fiber Artists' new show "Material Evidence" at The Art Museum of Los Gatos . The show is up until February 26th, go see it!


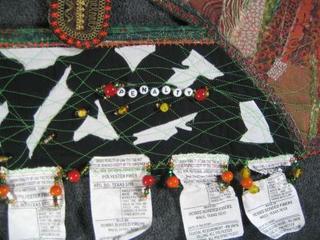
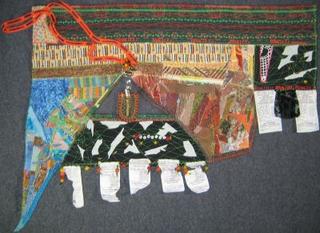
This shows the penalty tags, which by the way are heat reactive, must be some type of Tyvek like material. I liked how they curled and crumpled when I hit them with the steam. Then I added the beading.
The white shapes were scraps from the Kona coffee quilt, cutting out the blossoms. And remember I never throw away anything.
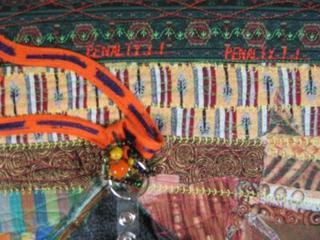
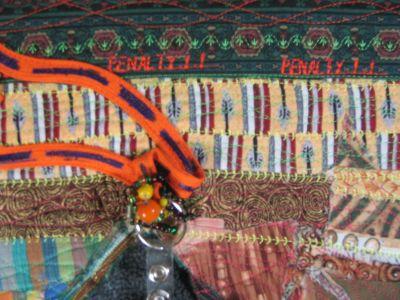
This detail shows the stitched out word: Penalty, and the freebie conference badge/pass tag complete with clip. It was fun to bead upon!
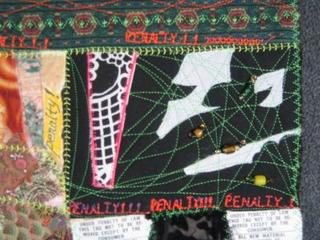
Another detail to see the stitching. I had fun using the Madeira polyneon (really is neon colored), with the cool stitches on the new machine (Janome 6500).
And here is my materials and artist statement in case you want to read it!:
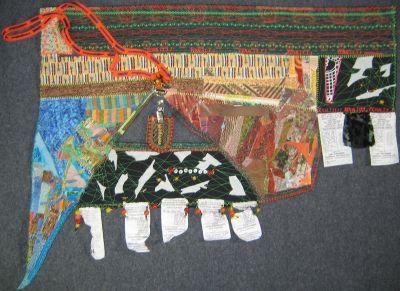
Materials: Cotton scraps, cotton knit, convention pass tag/clip, glass beads, fusible batting scraps, metallic thread, polyneon polyester thread, letter beads, edge trimmings from quilt sandwiches, silk burnout chiffon, gold glitter pen, sharpie markers, pigma pens, selvedge edges, tyvek "do not remove under penalty of law tags from pillows."
Artist Statement:
Weird in this case is the shape, the materials, the message. I always found it weird that the labels that arrive sewn into the seams of our pillows, mattresses and other stuffed items don't always get removed by we consumers. We read the "Do Not Remove Under Penalty of Law" line, and read no further. Instead we put up with scratchy, sharp, noisy labels under our ears and hope for them to eventually soften up with washing. Pay attention and read the whole thing, there are NO mattress police that will swoop in and nab you if you cut that tag off. Really.