Showing posts with label gift giving. Show all posts

Friday, January 21, 2022

2Folios 2gether


I need to confess that I was hiding the fact that I actually made not one, but two Hold-Tite Folios. One for me that I already blogged about, and one for friend Jaye's birthday gift. Now that she has it in her hot little hands, I can go ahead and blab about it too.


I'm glad I took the time to change my thread colors for this visible stitching.

The felt that I used is a wool blend, but the type of felt isn't terribly important you just need something to help block the Sew-Tiles from glomming onto each other from either side of the folio. Magnets gotta magnet, you know...
I took the extra time to hand sew the binding down and it looks much nicer on both sides. This is me, always learning that particular lesson over and over again. sigh.


I also added a little doubled-over ribbon pull tab on the outside to Jaye's folio like I did on mine. I found it really helpful for opening the folio up easily.

Mine on the right is completely filled, both sides with Sew-Tiles, so it's expanded up to full size.

Friday, January 22, 2021

Mini Maker Case Part 2


Okay, back to the Mini Maker Case saga. I got excited the next day and sewed everything together, and didn't pay enough attention to the bottom vs. the top. Oops. Also, why is it so much bigger than the one friend Jaye made me?


Honestly, I liked how this looked, and even tried it out with my mini iron, but it just wasn't as functional to hold the iron securely. This was when the power went out, so I took my seam ripper and the sewn  together incorrectly case outside on the deck to use the sunlight and not rip up the fabrics taking out all the stitches.

Now that it was sewn together the right way, I trimmed the raw edges. Always a **gulp** situation, but I took it slow and it worked out. I'm really glad that I hadn't done this step before I noticed the wrong-way sewing.
All turned right-side out, and it looks so nice!
Here's the back view. 


And tah-dah, all done! And by generator powered sewing machine and battery-powered light.

It's pretty snazzy looking.
And here's the surprise red bias binding on the inside! Finished hand stitching it while crying over the powerful, poem written and performed by our very first Youth Poet Laureate ever, Amanda Gorman. 
I only listened to it on the radio first, because my cell service was wonky because of the power outage and it still moved me to tears.  I saw a few clips later and looked up the whole performance. Yes, tears again. Her visceral acknowledgment of the pain and terror of the last few weeks, all wrapped up with a young person's perspective on hope and belief in our country is such a gift to all of us.

Watch it here if you missed it, really something to see and not just hear. 

I just pre-ordered her new book of poems, The Hill We Climb, and would you look at that, it's the #1 best seller! 

Note: "As an Amazon Associate I earn from qualifying purchases."

Thursday, January 21, 2021

Mini Maker Case Part 1

 Our power's back on, hooray! So here's a longer post explaining yesterday's short one, now that that the gift has been given and I have internet available.


All the pieces, all the parts, all laid out and ready to go to make a Mini Maker Case for friend Jaye
I labeled every single thing as I cut it out so I wouldn't mix the pieces up, because there are a whole lot of them! And yes, that's The Meg over to the right, she's on her bed on the other side of my worktable so I don't run over her with my roll-y chair.
I bought friend Jaye an Oliso mini project iron for her birthday and I wanted to make her a case to carry it to a class at some point in the hopefully near future. Call it an aspirational gift I guess. Of course she very thoughtfully did the same for me for Christmas, it's really nice to be on the same wavelength.
Cutting the rectangles of Timtex into rounded corners with the provided templates. I added some fusible to this so that it wouldn't shift around or bunch up when I started sewing.


I had bought a grey zipper to go with these fabrics, but unfortunately it wasn't wide enough for the pattern requirements. I left myself a note so that I wouldn't just use the grey one when I started sewing the next day. Luckily I had a turquoise one in my stash that was the right size. It's a vintage one, but is in perfect shape.

Hey, not so bad looking of a zipper insert.
I really really like how the lid and handle turned out.
I'll leave it there for now and finish up with showing the rest of the process tomorrow.

Note: "As an Amazon Associate I earn from qualifying purchases."

Friday, November 22, 2019

Duvet Doings

 I've been working on the duvet cover I'm making for my daughter's birthday gift (a weighted blanket). I want to be able to give it to her on Thanksgiving next week, so I'm buckling down to get it done. Since it'll likely get washed a lot, I've taken the extra time involved to do French seams. I was very out of practice, but it really is easy and looks so nice when it's finished.
 Here's how the two sides look now that I've gotten them sewn together. The fabric that looks white is a pale pink with white circle-ish absract batik roses. I thought having one side be lighter than the other would be nice so she can have some variation in how her bed looks with the blanket on it.
Now to decide on snap tap, buttons, velcro or??? as the closure.

Sunday, January 08, 2017

Holiday Gifts


This was the extent of the holiday gifts I managed to make this year. Calendar towels from prints  chosen off of Spoonflower, printed out on toweling. It's a nice, sturdy toweling fabric and they are pretty easy to hem up.
Unfortunately at least one of the calendars was inaccurately printed  (30 days in February was the giveaway!) which my giftee noticed and pointed out. Very embarrassing, but hey it's still a cute towel, and the gift-giving thought hopefully still counts. 
The squid one was for me, because why not make a gift for yourself (a fairly new holiday motto.)

Tuesday, September 08, 2009

An IBOL On Its Way


I made it just under the wire to send an IBOL as today was the deadline. What's an IBOL you ask? It stands for Iraqi Bundle Of Love and was organized by Major Art La Flamme, who also is the son of, and husband of a quilter (Kristin La Flamme) , who knew that one thing quilters have in common is that we usually have a large stash of stuff we're honestly never going to use. His idea was to get a bunch of bundles of sewing supplies over into the area of Iraq he's currently stationed in, to be able to distribute during Ramadan.


I just kept forgetting to do it for some reason, but once I got started, it went together very quickly. I got together lots of solid colors of fabrics that I don't use, along with a bunch of kid prints that are really bright and cheery. I also put in some sewing supplies like thread, needles ribbons, embroidery floss and a good pair of scissors.


The instructions were pretty clear and it was easy to find stuff that would be useful and hopefully appreciated too.
So far he's collected 500 bundles to distribute, which is pretty darn cool!

Friday, December 19, 2008

This Years' Gift Bags

I've always loved wrapping gifts, it was my first paid job that I ever held, gift wrapper at the mall. And I do still use purchased Christmas wrapping for a lot of my gifts, but I'm trying to transition over to utilizing methods that are recyclable or reusable. Thinking of all that paper used and then thrown away seems so wasteful and extravagant. I've found that purchased gift bags can last a long time if you pack them away for storage neatly. There are about 15 or 20 of these that we use and pass back and forth in our family. One year I bought a bunch and so did my mom, so we've been using the same group for several years now. Admittedly they start to look a bit tatty after a few uses, but it is fun to see the same ones, almost an expected part of the decorations. But with the gift bags, you still need to at least wrap the gift in some paper covering, otherwise peeking is just too easy.
So one solution is using a fabric gift bag. No paper required, and very durable, and in most cases washable. Sure they are floppy and casusal looking, but you know what, so am I!
Every year I make a new batch of fabric gift bags for Christmas gifts. Some of which come back to me, to be reused, some that do not. I hope they get reused by whomever ends up with them, but who knows, right? This is a bunch of the new ones. I don't measure anything or use a pattern, just eyeball the gift that I'm planning to be contained, and add a little extra.

Crazy holiday cats, they all have such goofy expressions. Can you imagine trying to get a coat, hat and scarf on your cat? Hah! You'd have to come visit me in the hospital if I tried it I think.

This one is for a sports loving guy. The Santa print is from a panel print that had Santa Sports boxers. I pieced some strips around it to make it big enough to contain the gift.

This one I made the top differently, making a double stitched channel for the ribbon, leaving a collar at the top. I think it looks a little fancier, although it uses a bit more fabric. But, hey it is a gift right? Be extravagant, besides I bought this fabric on major big time post-holiday sale. Which reminds me, after I made these bags, I'm almost out of holiday fabric, better get some at the upcoming sales for next year...

I like choosing a ribbon color that contrasts a bit, makes it easier when opening gifts in low lit rooms. I use an embroidery stitch of bells or stars to nail down the top hem, it is subtle, but I like how it make the finished bag look, it adds a bit more subtle decoration.
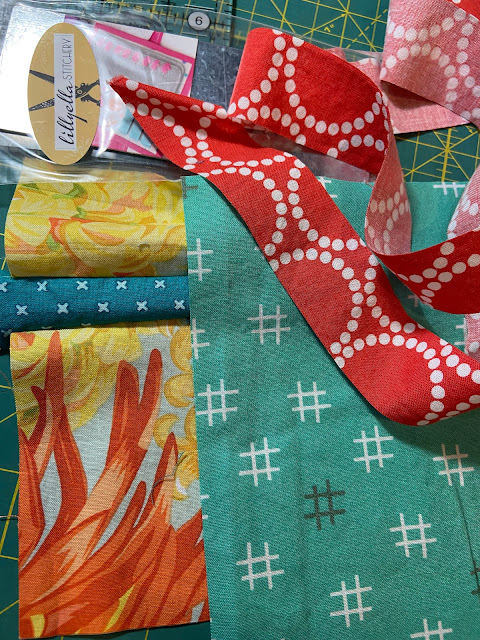
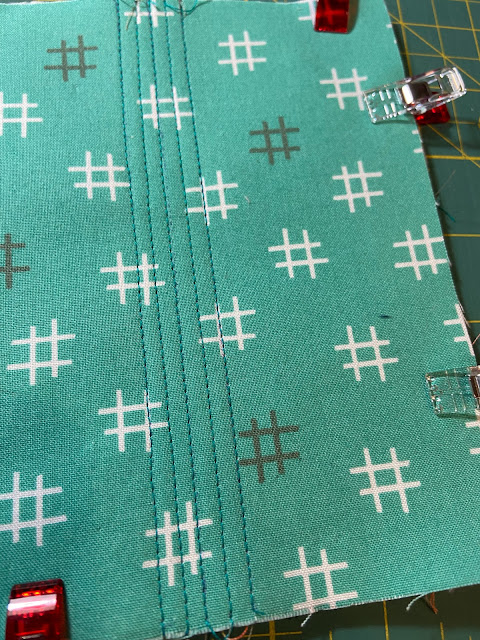
This one was for a smaller gift, and I felt like making something new up instead of just the usual bag. I had some leftovers from cutting out curvy bits for the holiday vest I'm making myself, so I took one that was already a nice shape, did a bunch of stitching on it with some quilt batting underneath, made a facing, sewed it on right sides together, turned it right sides out, made a "hinge" and sewed that to the top of the bag. Then for a closure I used a button with a ribbon stitched on loop.

How about you? What's your favorite wrapping solution?

Tuesday, February 12, 2008

Roll It Up

I needed a really good birthday present for friend J, and she had recently posted about a colored pencil roll she'd found online at PinkChalkStudio. I guess this is also in the book "Last Minute Quilted Gifts."
Luckily the blog post had some directions (not exact, but enough to get me going). The first step was cutting strips in each color. This was made to fit the Prismacolor 24 set. That was the most time-consuming part of this project! Pulling out the red box. Then the orange box. etc... as we march through the rainbow.
After that it went pretty fast. Sewing the colored strips together, finding a good fabric for the pocket (I used a thick woven cotton, almost to a light canvas. That was folded in half and basted along the sides and bottom. The filling was flannel so that the roll would roll up small enough. I chose some fabrics for the outside of the roll, right sides together, with the ribbon tie basted on one end.
After sewing around the outside, then turning to right sides, I did some pressing. Then the stitching in the ditch between each color, over the pocket to make the holder for each pencil.
This ribbon started out as just a boring white one, but I had this really thin trim that I thought tied in (haha) really well with the fabric I'd chosen for the outside of the roll. I sewed that on with clear thread.
Tada, voila', fini',done! And I'm happy to report that she really liked it!
And it turned out that I read the notes I'd made on assembly wrong and had thus cut the colored strips twice as long as I needed. So now I have one that I can assemble for me. Haha, I love "mistakes" like that, wonder if I really really wanted one subconsciously and thus changed the number around in my conscious brain.

Tuesday, December 18, 2007

Gift Tags

I bought this small (about 4x8") upholstery sample book for the totally bargain price of $2 to help repair a friend's chair where her cats had been a little too enthusiastic with the claw sharpening....That hasn't come about yet mostly because I couldn't find it! Finally I found this book when I unpacked some completely unrelated boxes (it was in with some of the boys' toys!?!?).
This is a shot to show how it was constructed, pretty heavy duty! I guess they have to make them pretty tough to stand up to all the fabric shoppers. Once the fabric was liberated from the cardboard and staples I had to start removing the stickers.
After filling up my fingernails with sticky gummy paper and not completely removing it anyways from the fabric, I decide to just cut off the end that has the sticker! Brilliant no? Lazy, yes?! And those little cut-off, kinda of stiff pieces of nice shiny fabric all pinked on the edges made me think....Holiday Tags!
So I cut some recycled white cardboard to size and glued them to the stickery side of the fabric sample end.
Here they are all drying. I hole punched in each corner and ran them through the ribbons on each of my fabric gift bags and they look terrific! I love how I can share my love of fabric with unsuspecting family members, bwahahaha.
An Easy peasy project, give it a try!

Saturday, November 17, 2007

Gift Season Approaches!!


I'm coming around to the idea that I don't want to go on a big buying spree for the holiday gift giving season that is upcoming.

We're absolutely swamped with stuff around here. This has been brought home to us in a big way, over and over again as we trudge through into year two of the remodel. The garage, backyard, front yard is filled with stuff that hasn't even made it back into the house.
Why oh why do we have all this stuff ???, I keep asking rhetorically. No one answers...


We (my family), all seem to have a hard time giving up what we already have in order to replace it with something new. That rule or tip just doesn't work for us.


So it seems silly to be buying tons of new things to plop on top of the old things and gather even more dust.


I'm vowing to try hard this year to give things that are basically consume-able. Things that will be used up, not be too precious, things I've cooked that the giftee can consume quickly or use up or even giving experiences (tickets, trips, etc.). No knickknacks. No things just to give things.
I don't think I've come around quite far enough to the take the Buy Handmade Pledge though.

Maybe next year... The reason I hesitate is that part of the pledge is to request that others only give you handmade stuff. And at this point I don't think that is ok. If someone wants to give you a gift, let them! If they don't know you well enough to know that Handmade is A#1 in your book, then it would probably be quite rude to turn up your nose at their non-handmade gift. I think there is a lot of education needed so that people would think Handmade first.


Sewmamasew has a great list of tutorials all month long of gifts to sew


TreeHugger has a very cool list of gifts to give (or ask for) rated light green to dark green.


Some Questions I am asking myself:
What are my gifting ideas for the season? Is there a theme or vibe happening I need to expand on? What is my reason for even giving gifts? Obligation, duty, it is expected vs. joy, loving to give?

What do I like better, to give or to receive? How about others in my family or group of friends?

How many presents do I end up buying or giving or receiving? Is it enough, or do I always want to give or receive more?

What is it about this time of year that makes me happiest or craziest?