Showing posts with label Post Spooky. Show all posts

Saturday, October 31, 2009

Happy Halloween and Samhain!

Happy Halloween and Samhain! Here is a final bit of holiday sewing that I accomplished during the month.
I wanted to add to my long-in-process Halloween Houses quilt with something different than the pieced and paper-pieced houses and log cabins that I have completed so far.
I had to play around with the shapes until they fit together well. Free-hand cutting with no pattern makes it challenging. Sometimes I'm better at eyeballing sizes when I use this method.
I fussy cut the stem so that the bat and notes were on there without getting cut off.
Here's how it looks next to some of the other blocks after appliqueing down the shapes with orange and brown rayon thread.

Friday, October 30, 2009

Dog Collar Scrunchie

I just had to do some sewing with my colorful Halloween fabrics, so I made a dog collar scrunchie for Zelda. Might as well decorate the dog too, right?
I measured the widest part of the plastic buckle, then cut 3 strips of fabric, each about 1.5" wide across the whole width of 45" wide fabrics. I wanted it to be pretty close to the size of the actual collar so it wouldn't be too floppy.

I sewed those together on the long sides and then hemmed the ends, then I sewed the final seam to make it up into a tube and turned it right side out. Next I just fed the collar in and scrunched it up.
See how happy she looks?

She had to show me the other side.

Then she had to signal that the photo shoot was over by politely crossing her paws and shooting me a most dubious look. Sheesh, I really need to trim those claws don't I?

Wednesday, October 28, 2009

Costume In Process

I was at Beverly's Fabrics a couple weeks ago to get some glue and decided to get some fabrics to make myself a Halloween costume. I didn't really have anything in mind, but went to the remnant table to see what was there and if any ideas would spark up.
I found these three fabrics which I think will work together really well for a gold witchy woman costume. (I was a green witch last year) The upper left is to be a tunic-y blouse, the gold on the bottom a skirt, and the gold lacey stuff a skirt overlay. All of this was super cheap since it was on the remnant table, maybe $15 for all of it.

These other various nettings and tuelle and so forth are from my stash, they may make it into the costume, I was seeing if they complemented the piece on the right that is to be the skirt overlay.

The blouse has turned out well so far, for sleeves I used an embroidered sheer, it has an overall pattern of various sized circles. the neckline is just an elastic gathered style, real simple but it suits the fabrics well. The fabric for the skirt worked out to be just the right size for the simple gathered waist style I wanted to make. The overlay part was a bit trickier, but I safety pinned it in place while I was wearing it to get the draping right. (safety pins instead of straight pins!) Yes a dressmaker's form would come in handy for something like this. Guess I should get around to making one of those duct tape ones.
Now for the sash/waist thing I had sketched out originally to pull the top and skirt together. Haven't made it quite yet, I have to search for that gold satin embroidered upholstery fabric to make an obi-type sash. Hopefully I can find it and get that done, because it is almost Halloween!
Oh and a hat of some type, I was unable to find a gold witch hat in the stores. Maybe some gold spray paint or gold netting over a plain black one? Or make my own? I don't know yet. I guess I could make a golden sparkly wand too, there are plenty of sticks all over the place because of this second very windy day in a row. I have the gold hair spray and gold shoes and nail polish already so I'll be good and sparkly.

Monday, October 19, 2009

Scary Doll How-To

Here's a Scary Doll how-to, to make the doll I showed in my Halloween Party post on Saturday. I got the idea from WiseCraft ,but their starting dolls were fashion dolls (ie Barbies), our Goodwill was fresh-outta-Barbies so we snagged this curly haired doll whose hair was a little out of hand to start with.
The first step is to spray-paint the doll with a matte white spray paint. Front and back, hair included. Do a couple of light coats. Outside of course! My son Alex helped me out with spraying so I could take an action shot. I figured if I tried to do both I'd end up spraying either myself or my camera lens somehow.
A little paint ended up on my camera body anyways as I was turning the freshly painted doll over and then picked up my camera. sigh.
We chose not to spray paint her clothing but to instead "distress" it.
She was scary looking enough already for me at this point.
But Alex thought we needed one more step, involving the application of shall we say, excess and concentrated heat.
Here she is after being ever-so-slightly singed. I think this made her even creepier, more worn out and old-looking, kind of ratty and dirty and decrepit. And by the way if you do this burning step, do it outside (very stinky since all the materials are synthetics), and have a source of dousing water at the ready.
I think she's pretty scary looking. In the original instructions they were suggesting going over the faces with black Sharpies to make more zombie looking faces, but I like this ghostly apparition vibe.
Turns out that certain teenagers are more creeped out than you would imagine by this little ol' doll, which is why I keep putting her in unexpected places. Hey, I've got to keep them on their toes somehow. And get back for all those times they put the plastic scorpion in my shoes (Rotten Little Monsters!).

Saturday, October 17, 2009

Halloween Party Extravaganza

Welcome, welcome to my Halloween Party!

Be sure and visit some of the other parties going on around the Fanciful Twist extravaganza.


I've got all the decorations lit up and ready to spook and scare you.


I hope you remembered to dress up, and bring the mushrooms for the vegetable dip.


We're already gossiping and talking about those who haven't arrived quite yet. Yes the spiced cider is really spicy, that's what happens when you use brand new spices instead of those old ones in the back of the cabinet.
Some of us can never leave home without all our familiars, I don't know what I'm going to feed Herda's raven!
But that's ok, even one of my familiars has one of her very own!
Have a seat in my very best arm-chair.


Some of us may have gotten dressed for the part a bit hastily, I think Zurina has definitely rushed too much.


And she's even forgotten to put their eyes on and that hair, I told her to not bother with that hair iron, if you've got the curls, go with it I say.


We're gathering around the lit up Spooky Town houses and having a big bowl of:


Moosewood Carrot Soup with nice crusty sourdough.


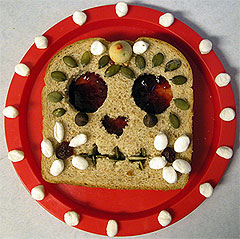
There are also some Healthy Halloween Sandwiches too:


Would you like some Ghoul-Ade?


And to finish it all off, a completely fabulous cake:Halloween Wedding Pumpkin Cake
I hope that you have a fabulous and magical Halloween!

Thursday, October 15, 2009

Pre-Storm Cornucopia


Before the big storm's arrival I went outside to see if there was anything interesting to photograph.One of the remaining sedum blossoms still looking pretty.
Some mum's that have morphed over the year from very variegated to this single rich color. Self-seeding flowers usually get to grow because I am always interested to see how they change from year to year.Rexie is not amused about the big storm, he doesn't dig the rain *at all*.
Finally back inside, I did it, whee! I got the wall behind the tv/entertainment center painted all the way to the corner where our stone wall/woodstove is. This picture is of the top of the TV with one of my favorite Halloween decorations with one of the surround sound speakers behind it. The wall was green up to about the middle of this picture and oh was it ever bothering me, just this little bit of unpainted wall.
I couldn't get up the energy to move the whole shebang away from the wall so that I could paint it because it was going to be soooo involved.
Finally I just started in doing it, and roped/guilted the rest of the family into helping me move the heavy stuff after nearly dropping the television (whoops). It did take a really long time, but now we've got a wall that is all one color from end to end. And I'm no longer bugged when I'm trying to relax and tune out with tv or movies. A really great bonus is that we now have all of the electronics plugged in correctly to the stereo, that took longer than moving the stuff did! All those cords...But now, ahhh, much better.
Now to take some post-big storm photos, it was a whopper for sure, 12" of rain in 24 hours....

Wednesday, October 14, 2009

The Cask of Amontillado

For the Traveler's Hart Autumn/Halloween deck this year, the assignment was to make something having to do with Edgar Allan Poe, and the size was new for these decks, 4x4". I hemmed and hawed and read a lot of Poe short stories and poems, but came back around to my first thought, one of my faves, The Cask of Amontillado. A delightfully creepy tale of revenge down in the family catacombs and wine cellar. I won't summarize the story because I don't want to spoil the ending for you in case you've never read it.
First step was painting the background, I started with some lightweight cardboard, almost a cardstock weight. For collage I like to use something more substantial than just copy paper, especially if I'm going to be painting. Here I used black and a couple yellows, one mustardy and one more golden. I knew that the combo would be fall/autumny enough looking because of the black+yellow=weird greens effect. I was going for an unsettled look, almost stormy. After it dried I went back over with some metallic copper to warm it up a bit more and give it some shine.

I had found in my stash a playing card with Poe's image on it (recognize this Dara? Thank!), so I fooled around with copying it at different sizes, it is really handy to have a copier at home that reduces and enlarges. I didn't want to have his image dominating the collage, because this is supposed to be about the story not necessarily focusing on him as a personality/author. I definitely wanted him to be more subtle and in the background, see if you can find him in the final image.


For some reason I've been using my stamp collection a lot lately for collage. I remembered there was a Poe commemorative stamp, but it turned out that I didn't have one. Found one for Sleepy Hollow, but that didn't really apply here, no matter how spooky the story. So no stamps used this time, but they make for a colorful heaped up picture.

Starting to arrange some of the major elements. Really glad I found the article about mummified Sicilians in Natty Geo with those great mummy hands and mummy in crypt.

Then after a trip to the copy store I used my Fiskars paper trimmer to trim up all 36 copies of the text and image cards to the right size 3x5". Every time I participate in these decks I am always amazed at people who fail to understand the size requirements 3.5"x5.25" "eh, whatever!" For a deck collection like this that I'm probably going to put into a book to look at, size issues don't matter so much. But when you try to make an actual deck to hold in your hands this variation in the sizes is more than just an annoyance.
The text card said this in an old curly looking font (Blackadder ITC) which Blogger of course does not support:

Inspired by The Cask of Amontillado
By: Edgar Allan Poe
“Fortunato!” No answer. I called again--“Fortunato!”
No answer still. I thrust a torch through the remaining aperture and let it fall within. There came forth in return only a jingling of the bells. My heart grew sick; it was the dampness of the catacombs that made it so. I hastened to make an end of my labour. I forced the last stone into its position; I plastered it up. Against the new masonry I re-erected the old rampart of bones. For the half of a century no mortal has disturbed them. In pace requiescat!
Here's the final image, click for much larger.
Can't wait to see all the other fun and spooky Poe inspired pieces in this collaborative deck.
Guess I'd better work on my Poe Tarot cards too...

Sunday, October 11, 2009

It Must Be October

You know it is October when:

  • The Cal Bears have folded early for the season and the 49ers are thinking about it, and the SF Giants are watching the post-season from home.
    Mini pumpkins are in my big glass vase, along a new sparkly witch and the much weaker light of the fall.
  • We've got a cord of wood delivered and stacked and the wood stove is keeping us toasty and warm as I assume my yearly role of HearthMistress.
  • Moosewood Carrot Soup was enjoyed thoroughly by my family as well as some friends of my teenager. They were surprised to know that it was mostly just carrots.
  • Jeans and socks are now being worn every day instead of shorts and sandals.

Friday, October 09, 2009

Halloween Making Links


Not too much Spook=i=fi=cation has been going on so far, just bought these two sparkly word blocks at the drug store. I can finally say that I've gotten one of the boxes of decorations out so far, but haven't opened it up quite yet.

I've been putting it off because of a little matter of cleaning up the living room "enough" to be able to decorate. I know dust is a good spooky Halloween decorating accessory, but it is admittedly at "worst-ever" status these days and I'm not being too self critical here, believe you me!

So of course instead of actually doing this cleaning, I've been either napping (thanks to a looong extended recuperation from the flu), or reading crafting blogs and I've got a few crafty Halloweenie links for you to go and peruse:


Whip Up (a list of links!).


A lot of these have some stuff that would be easy to do, some more involved, but all inspirational in their own ways.
So! Go make something!


Thursday, October 08, 2009

Halloween Napkin Tutorial

I just made a few new cloth napkins for my family to use this Halloween season. I took some pictures as I worked so you can see how to do it. Super easy, and a good use for all those cute Halloween prints you've been buying all these years. Oh, I mean, me, I've been buying them. Anyways, here's how!
Pick two fabrics, contrasting patterns and colors is good just for fun.
Iron them, stack them and then cut a square to the size that you like napkins.
The ones shown here are about 16" square, but you can make smaller or larger of course.
Sew right sides together, around all four sides leaving an opening on one of the sides to turn right sides out.
Before turning anything, clip the corners fairly close so that they won't be bulky and lumpy once you're done.Turn the whole thing right sides out, carefully poke out the corners nice and sharp. Iron down the opening so that it matches the already sewn seam.
You can just sew that opening closed and be done, but I like to use an embroidery stitch and go all around the edges. This closes up the opening and gives the napkin a bit more of a finished look.Voila' you're done! Now go make some dinner already!